
ES-K15 Camera — Setup & Usage
Step-by-step instructions for the ES-K15 screen-free digital camera. Each step includes an illustration. If you still need help, contact support@oiktech.com.
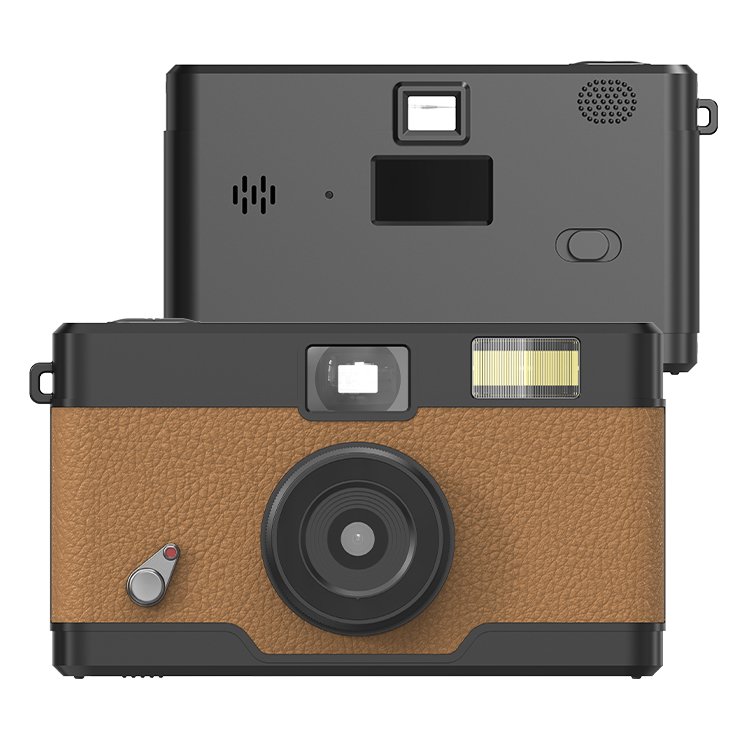
Know Your Camera
What each button and part does.
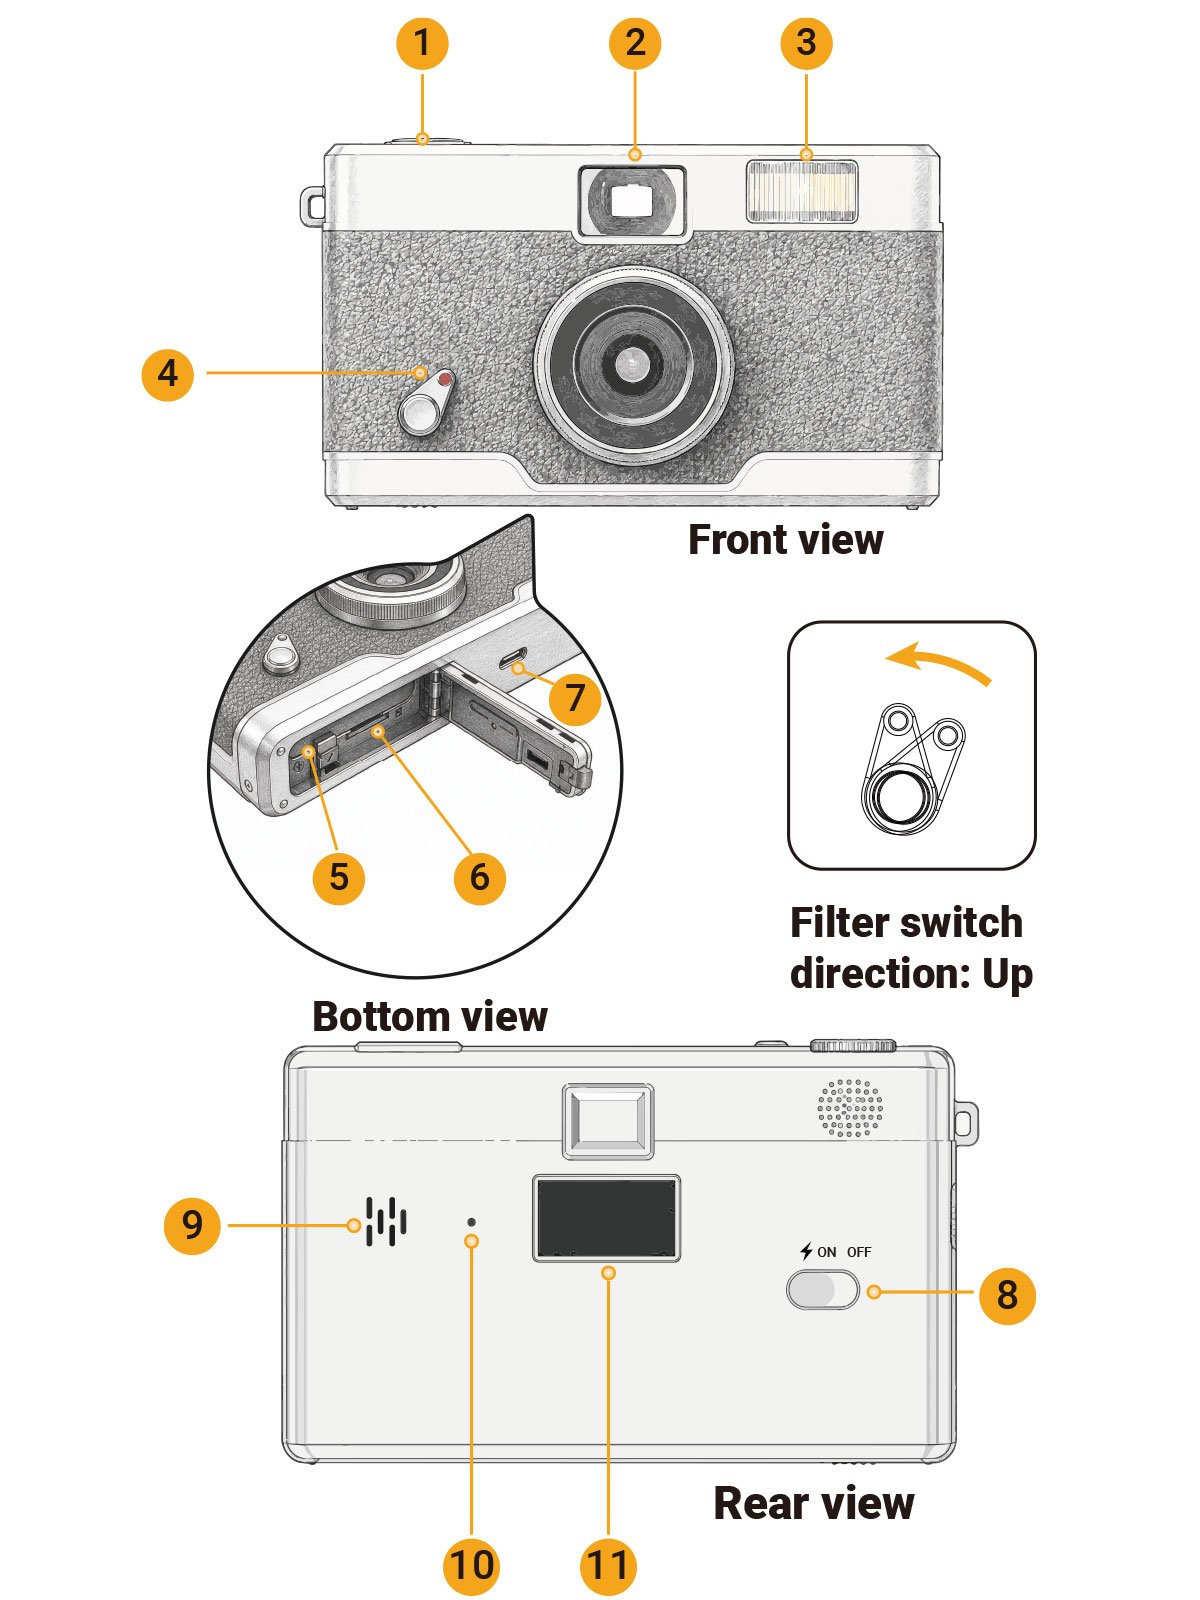
Front & Bottom
| 1 | Shutter ButtonPress to take a photo |
| 2 | ViewfinderLook through to frame your shot |
| 3 | FlashBuilt-in flash; enable with the ⚡ power mode |
| 4 | Filter SwitchPush upward to cycle filters (NORMAL → B&W → RETRO → COOL) |
| 5 | BatteryRemovable BL-5B lithium battery (750mAh) |
| 6 | Micro SD Card SlotBottom of the camera; supports up to 128GB |
Rear & Sides
| 7 | Type-C PortCharge the battery and transfer photos |
| 8 | Power SwitchSlide between OFF · ON · ⚡ (flash) |
| 9 | BuzzerBeeps to confirm operations |
| 10 | Indicator LightCharging status: green = charging, off = fully charged |
| 11 | Status Screen0.96″ photo-counter / status display (no photo preview) |
1. Get Started
Set up the battery, memory card and power before taking photos.
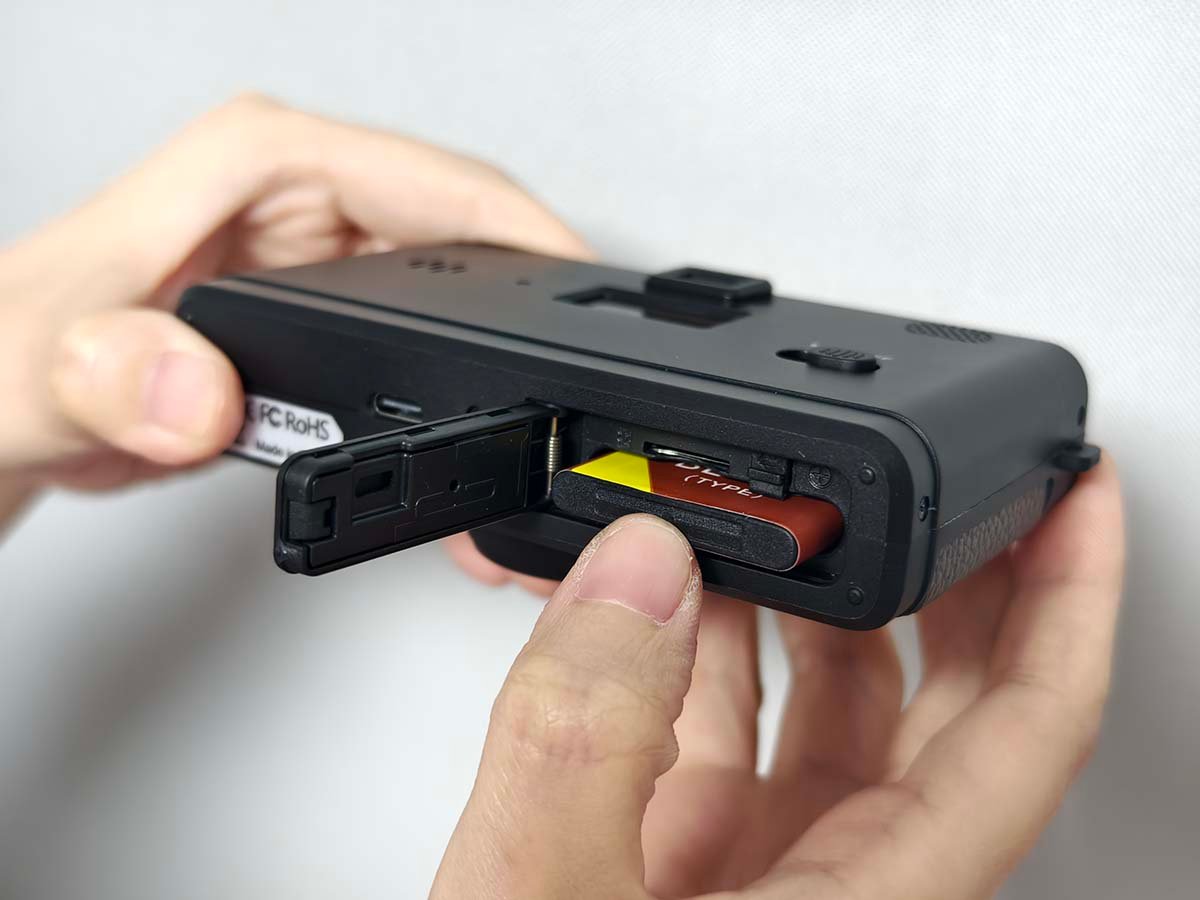
1.1Insert the battery & microSD card
- Open the battery compartment on the bottom of the camera.
- Insert the BL-5B battery, matching the + / − orientation.
- Insert a microSD card (up to 128GB) into the card slot until it clicks.
A microSD card is not included. Format a new card before first use — see 1.4.
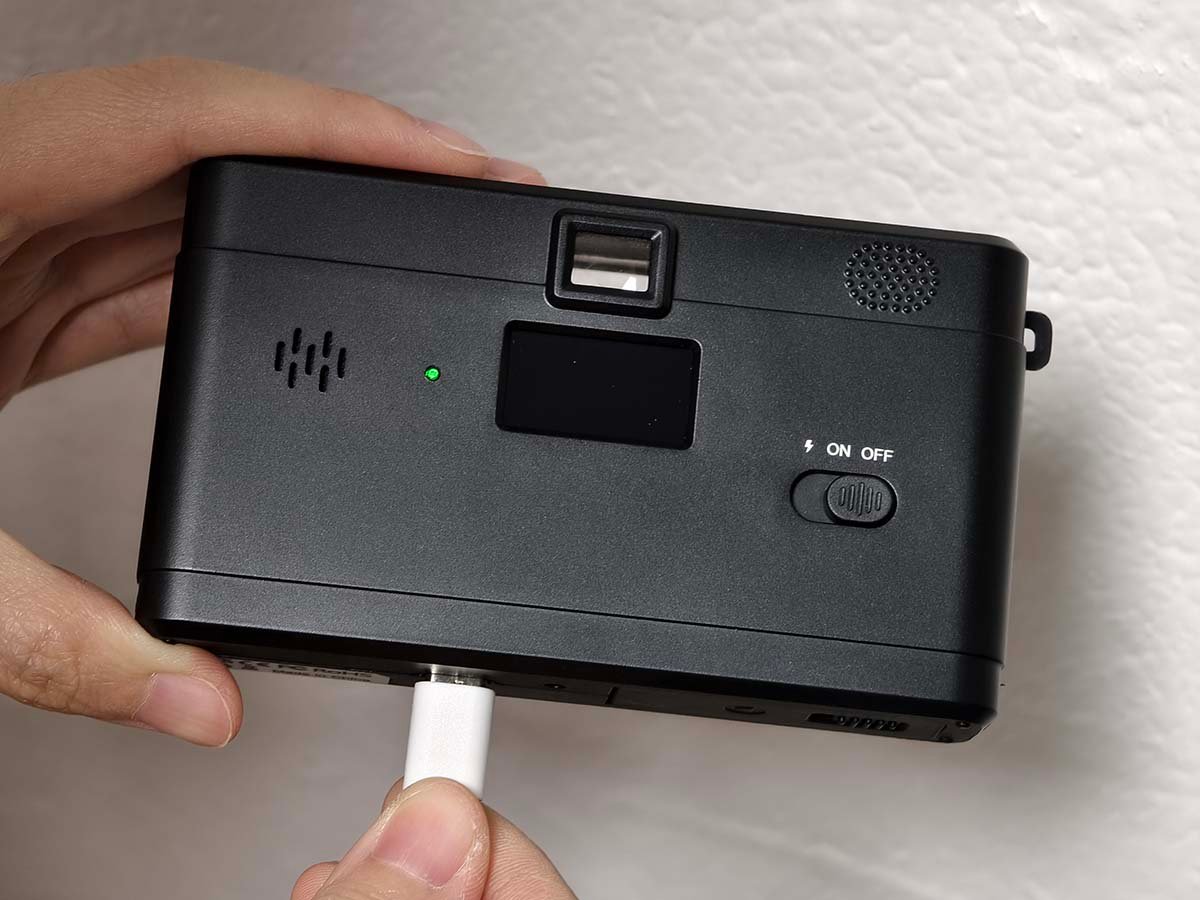
1.2Charge the camera
- Connect the included USB-C cable to the Type-C port on the camera.
- Plug the other end into a USB charger or computer.
- Wait for the indicator to turn off — fully charged.
Indicator: green = charging, off = fully charged.
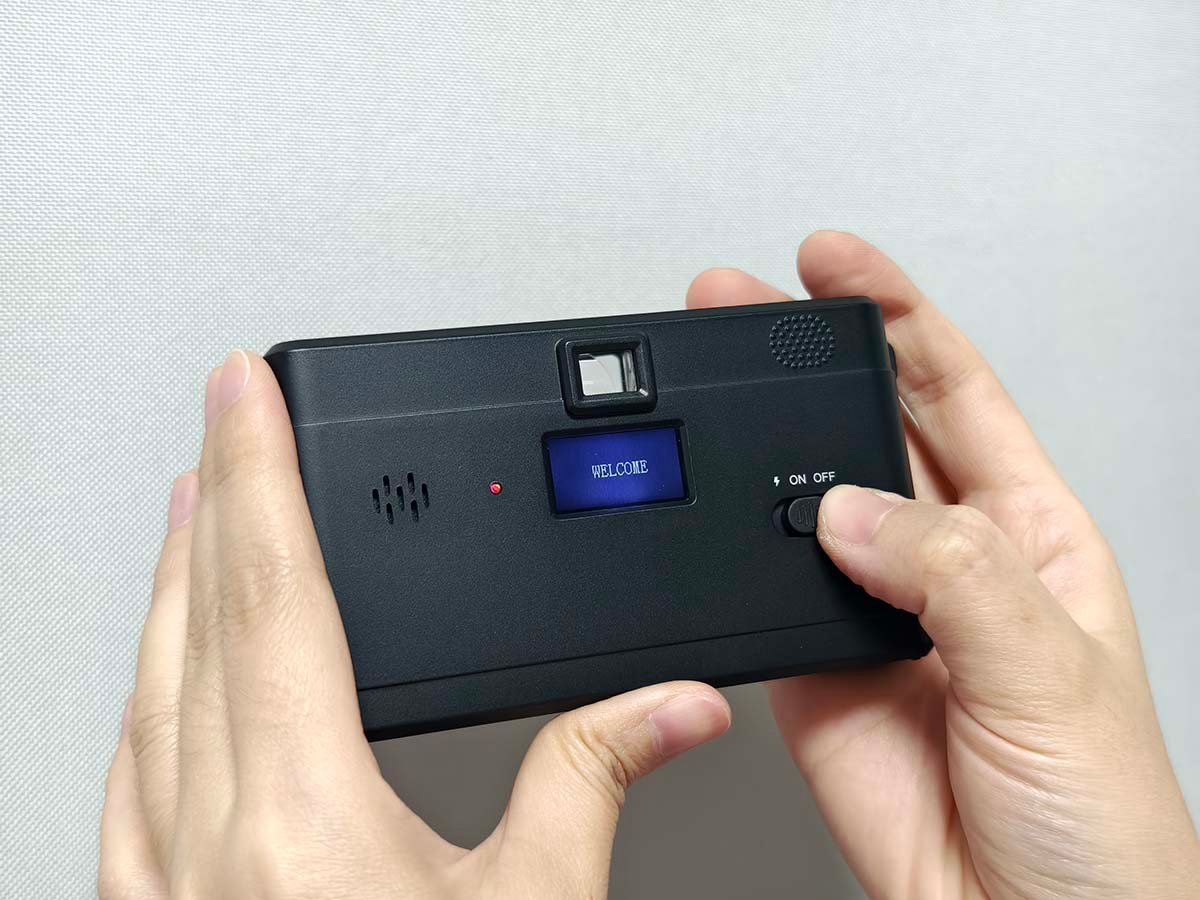
1.3Power on / off
- Slide the Power Switch to ON — power on, flash off.
- Slide to ⚡ — power on with forced flash.
- Slide to OFF to turn the camera off.
1.4Format the memory card (first use)
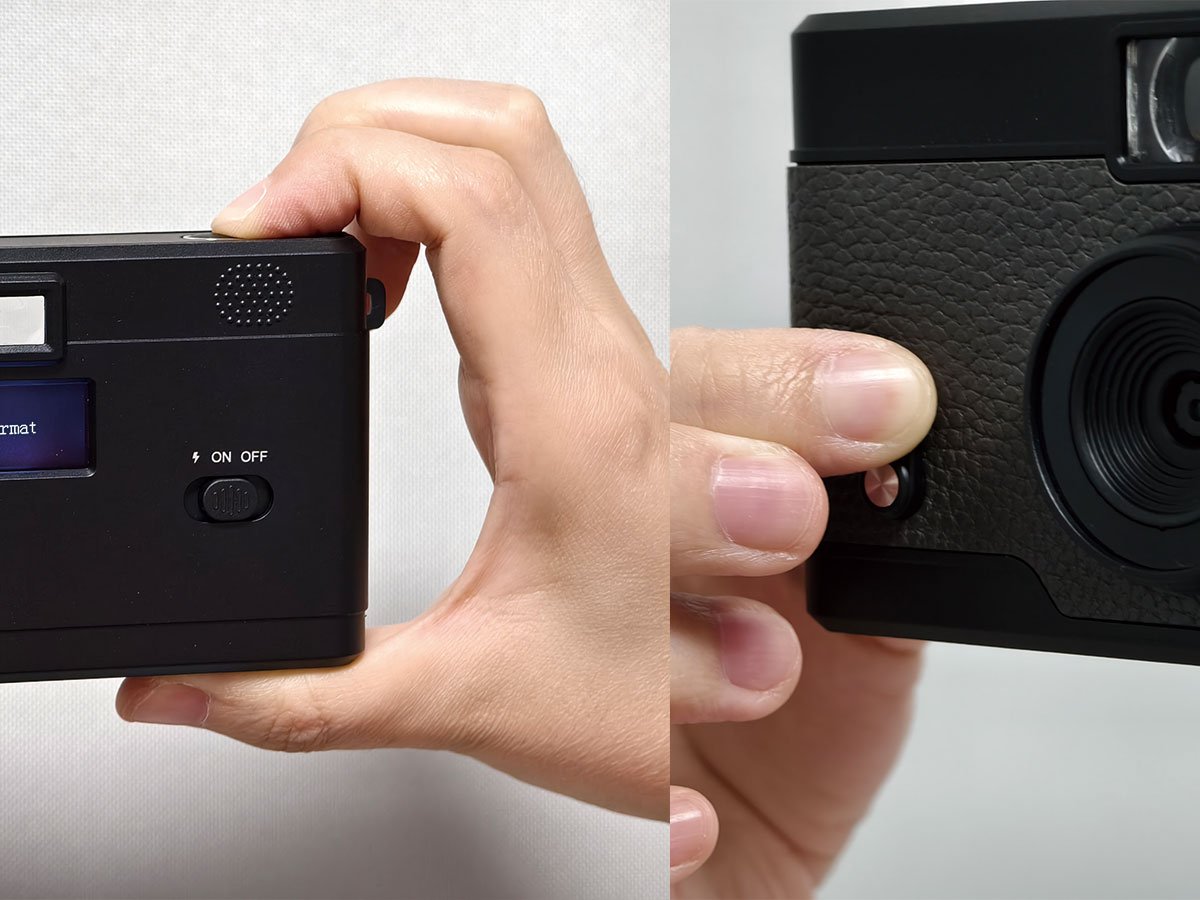
- Turn the camera ON.
- Hold the Shutter Button for 8 seconds until FORMAT appears.
- Within 2 seconds, push the Filter Switch upward to confirm.
Formatting deletes all data on the card. Do this only with a new card or a card you want to erase.
2. Take a Photo
The camera has no preview screen — frame the shot through the viewfinder.
2.1Take a photo
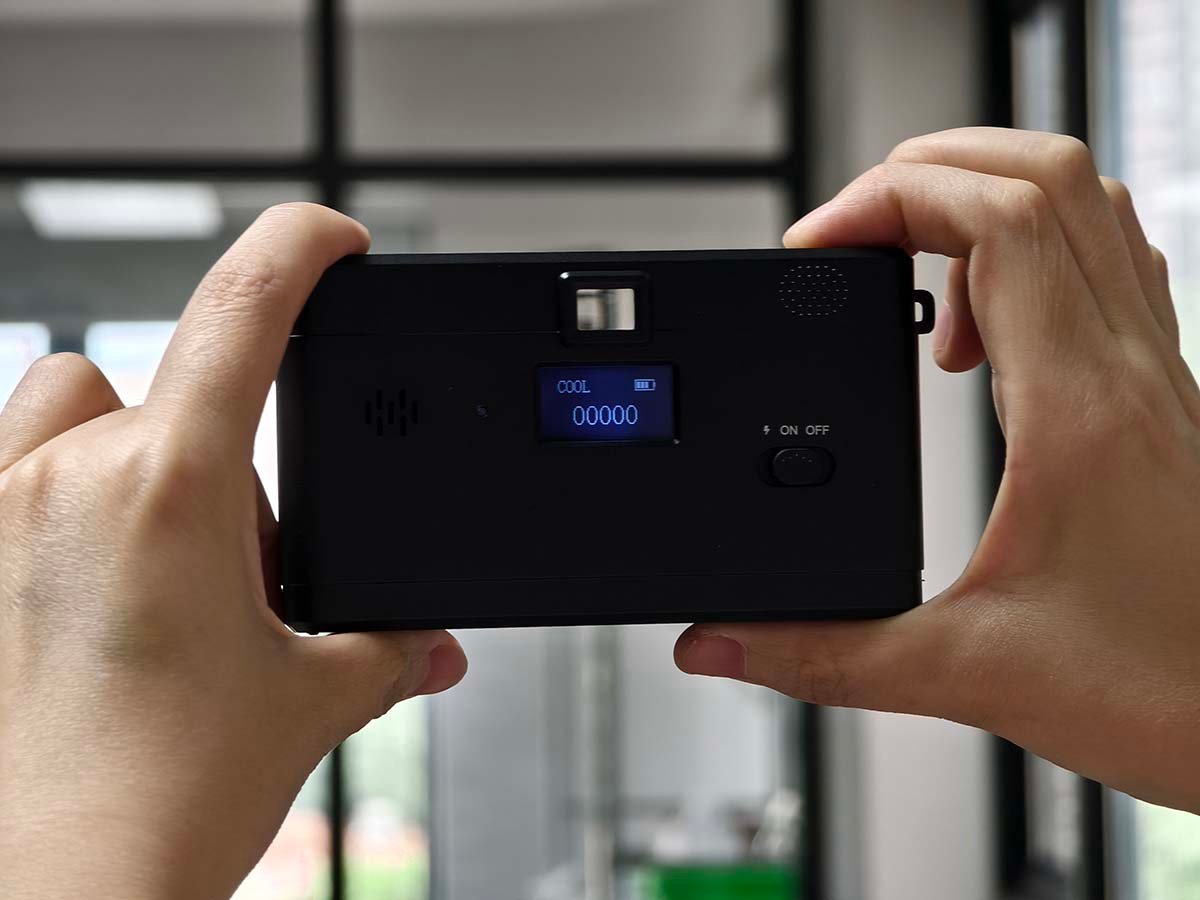
- Power on the camera (ON or ⚡).
- Look through the viewfinder and frame your subject.
- Hold the camera steady.
- Press the Shutter Button. The photo counter on the status screen advances.
The fixed-focus lens is sharpest from about 1 m (3.3 ft) to infinity. Keep the subject at least 1 m away.
3. Filters & Settings
Built-in color effects and the date stamp.
3.1Change the filter
- With the camera on, push the Filter Switch upward.
- Each push cycles to the next filter:
NORMAL → B&W → RETRO → COOL
NORMAL = original color · B&W = black & white · RETRO = warm brown · COOL = blue tone.
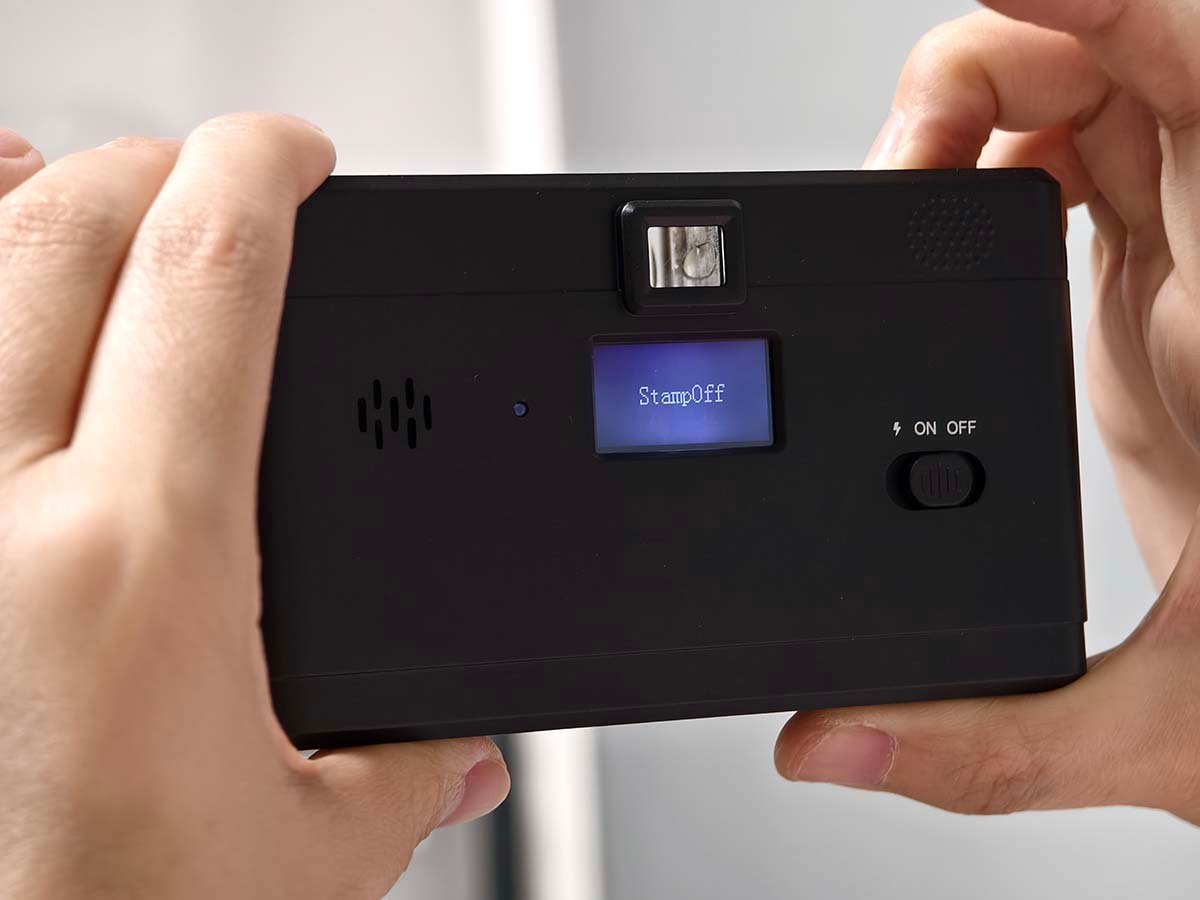
3.2Turn the date / time stamp on or off
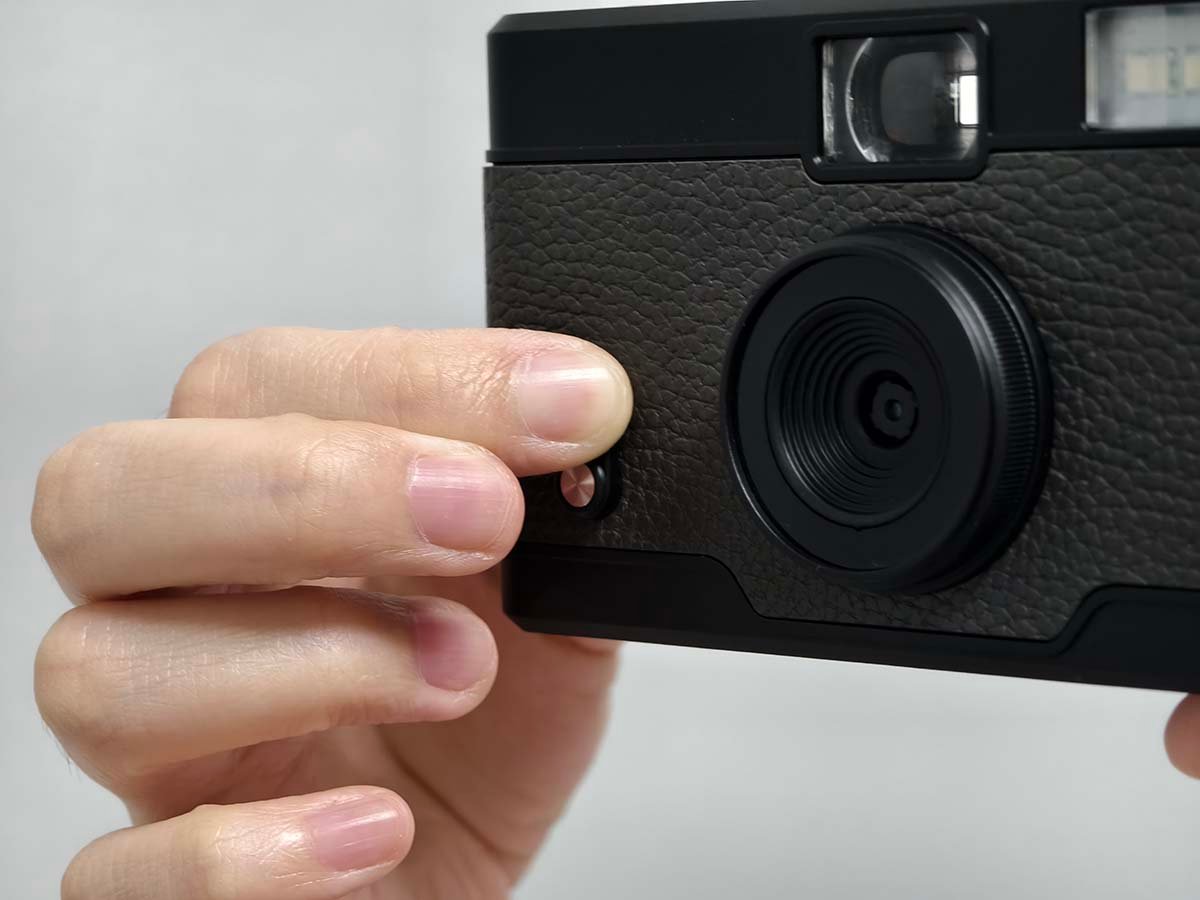
- Press and hold the Shutter Button for about 3 seconds, then release.
- The status screen shows STAMP ON or STAMP OFF.
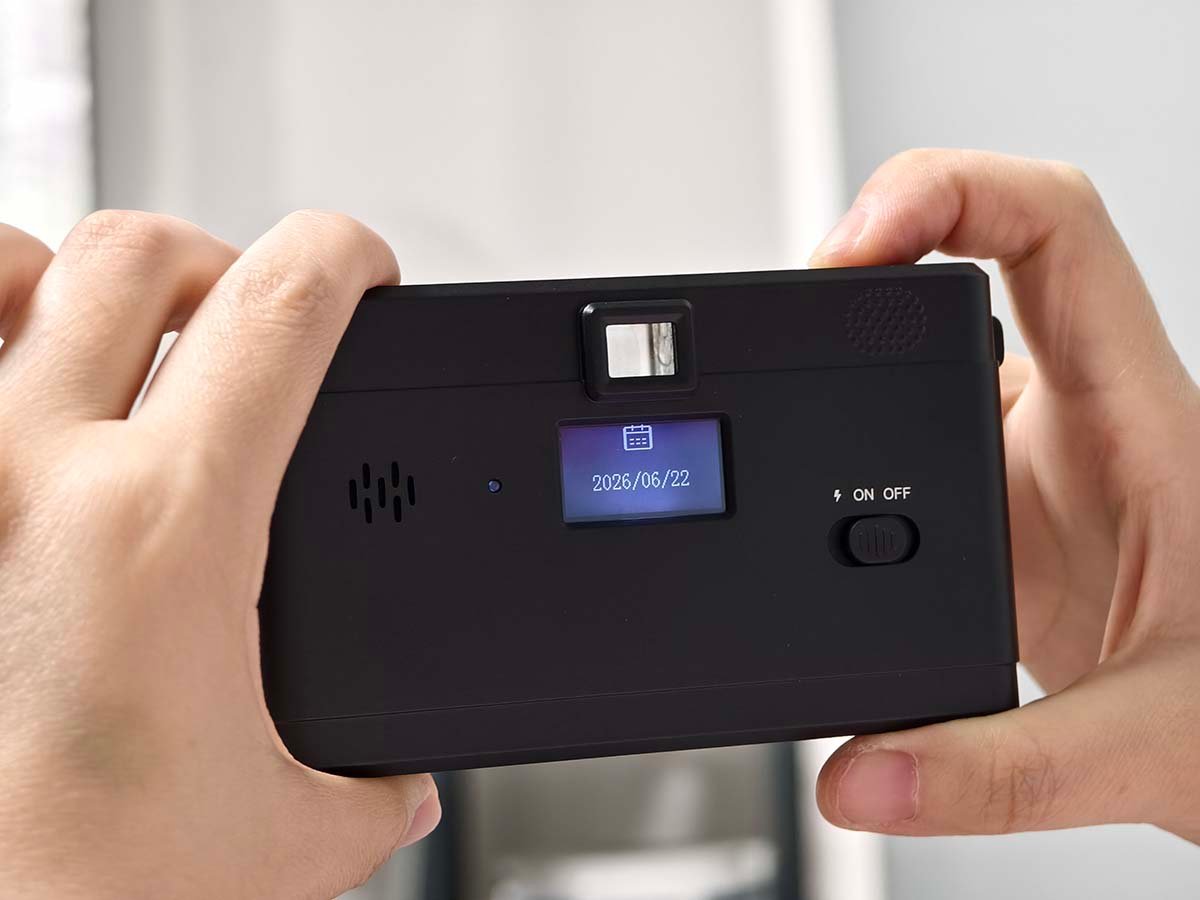
3.3Set the date & time
- Turn the camera ON.
- Press and hold the Shutter Button + Filter Switch together for 8 seconds to enter setup.
- Push the Filter Switch upward to adjust the value.
- Press the Shutter Button to move to the next field: Year → Month → Day → Hour → Minute.
4. Transfer Photos
Move your photos to a computer or phone.
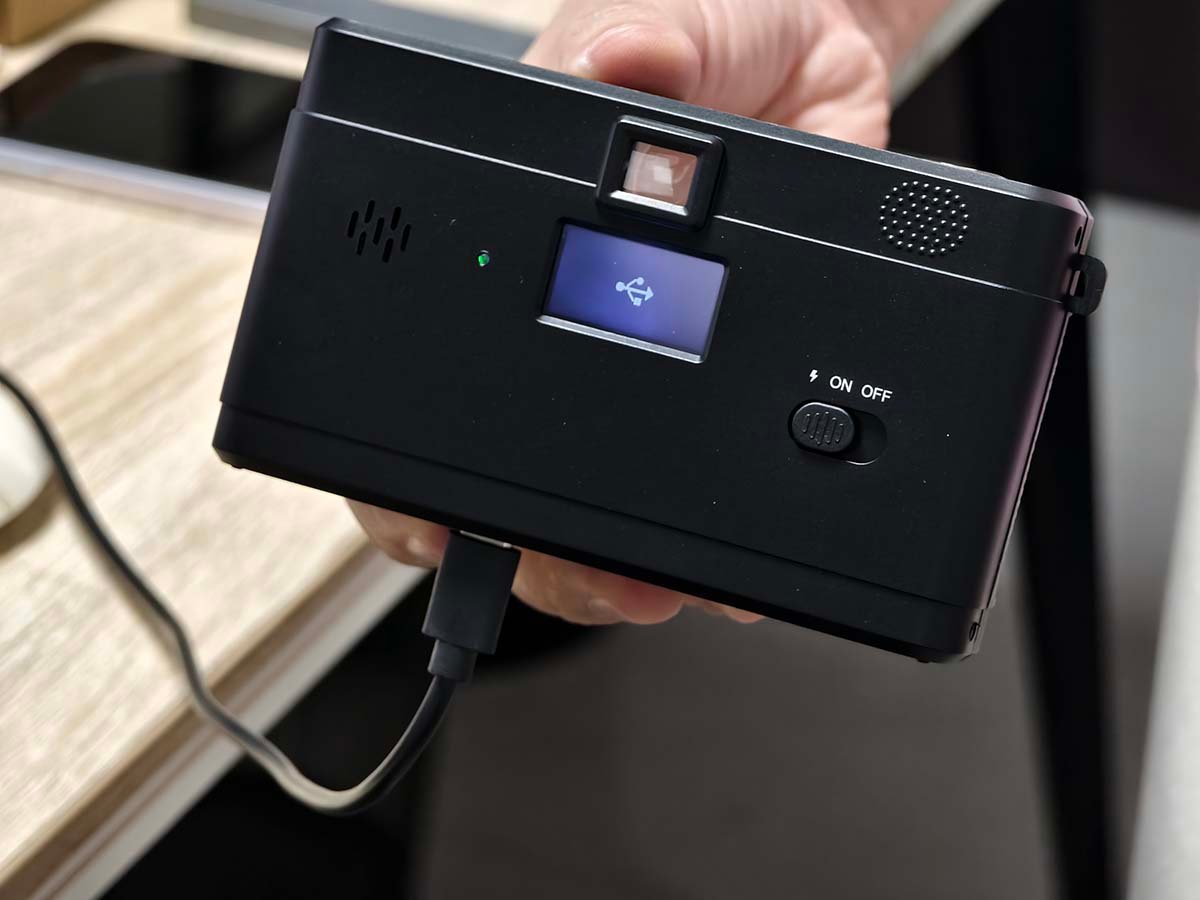
4.1Transfer to a computer
- Connect the camera to the computer with the included Type-C USB-C cable.
- Power the camera ON. It appears as a removable drive.
- Open the drive and copy your photos to the computer.
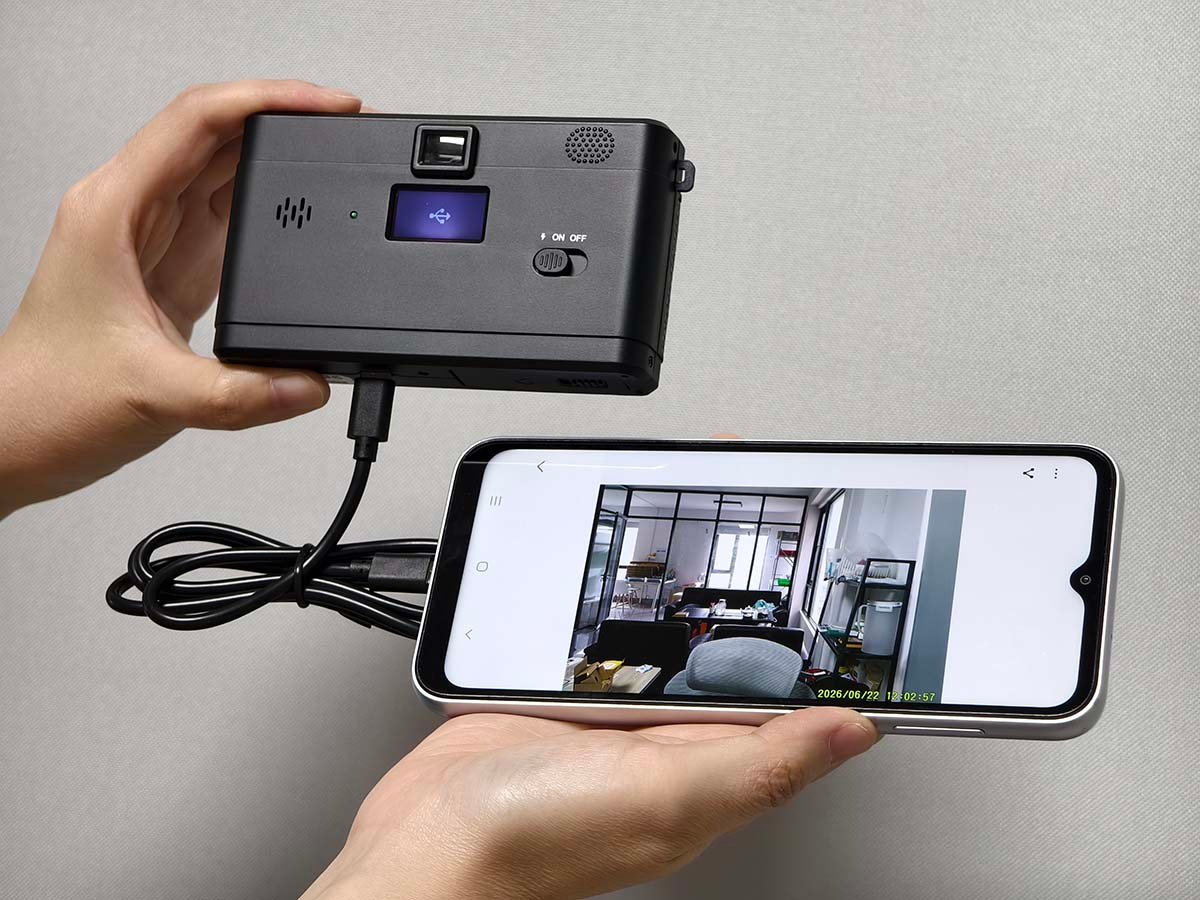
4.2Transfer to a phone
- Connect with a USB-C to USB-C cable, or
- Remove the microSD card and use a card reader / OTG adapter.
- Copy the photos to your phone.
5. Specifications
ES-K15 (K15) — Retro Screen-Free Camera
| Available Colors | Black / Brown |
|---|---|
| Sensor | 8MP CMOS sensor |
| Lens | Fixed lens, F/2.2, f=3.7mm |
| Focusing Range | Fixed, 1.0 m ~ infinity |
| Photo Format | JPEG, 8M resolution |
| Image Stabilization | EIS |
| Photo Modes | Original / B&W / Retro / Cool |
| Storage | microSD (TF) card, max 128GB |
| Screen | 0.96″ status display (photo count), no preview screen |
| Flash | Built-in flash (Xenon or LED, optional variants) |
| Port | Type-C (charging & data) |
| Battery | Removable lithium battery BL-5B, 750mAh |
| Dimensions | 115 × 66 × 35 mm |
| Weight | 110 g (with battery) |
6. FAQ
Common questions and troubleshooting.
How do I format a new memory card?
Why can’t I preview my photos on the camera?
Why won’t the camera turn on?
Why don’t my photos get saved?
My photos look blurry. What should I do?
Is the camera waterproof?
7. Warranty & Contact
1-year warranty covering manufacturing defects from the date of purchase. It does not cover damage from misuse, drops, water, or unauthorized repair.
Support Email
Business Hours
Monday – Friday: 9:00 AM – 6:00 PM (PST)
Saturday – Sunday: Closed